In this article, we're going to walk you through the steps for setting up an email account on your iPhone using the Mail application. The Mail application is the default email client typically pre-loaded on your iPhone. It's feature-rich and a great option for anyone looking to set up email on their iPhone.
To add a new email account to the Mail application, follow these steps:
-
Open iPhone Settings: Locate the Settings app on your iPhone. It looks like a gear icon and is typically found on your home screen.
-
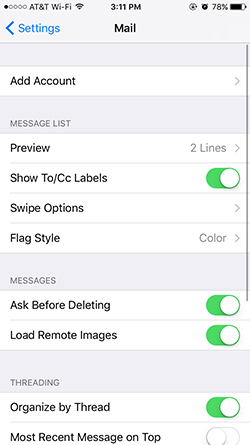
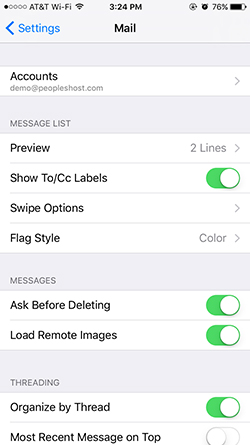
Navigate to Mail Settings: In the Settings menu, scroll down and tap on "Mail".
-
Add a New Account:
- In the Mail settings, tap on "Accounts".
- Tap on "Add Account".
-
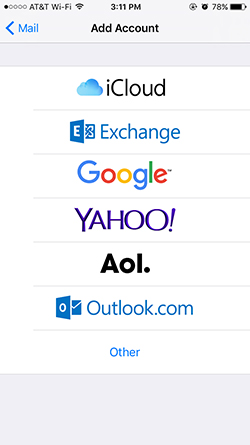
Select Other: You will see a list of popular email providers. Since we are setting up a custom email account, select "Other" at the bottom of the list.
-
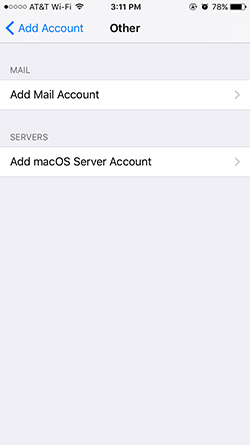
Add Mail Account: Tap on "Add Mail Account" to proceed with the setup.

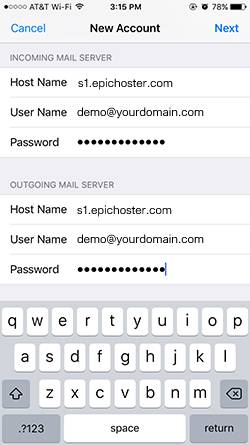
Entering Your Email Account Details
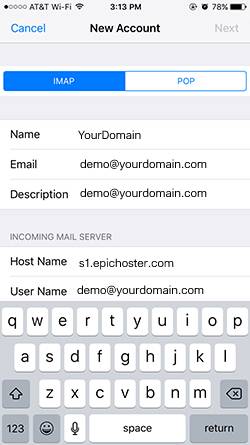
Now that you're on the New Account screen, you’ll be asked to enter the following details:
- Name: Enter your name as you want it to appear when you send emails.
- Email: Enter your full email address (e.g., demo@yourdomain.com).
- Password: Enter the password for your email account.
- Description: We highly recommend using your full email address as the description. This makes it easier to identify your account in the Mail app.
After entering your email account information, tap "Next".

Important Note on Email Configuration
In the example above, we used the server's Host Name as the Incoming and Outgoing Mail Server. However, if your domain is already pointed to your EpicHoster nameservers, you can use mail.yourdomain.com. But, remember, if your domain doesn't have an SSL Certificate, avoid using secure email ports with mail.yourdomain.com.
Why Use the Server's Host Name?
- Ensures secure email transmission.
- Avoids complications with SSL Certificate.
Using Your Domain with Secure Ports?
- Only if your domain has an SSL Certificate installed.
Recommended Approach:
- Stick to the server's Host Name for secure email handling.
Remember, earlier, we suggested using the email address for the Description when adding the account to the Mail app. Here's why:
Testing Your Email Setup on iPhone
Congratulations! You've successfully added an email account to your iPhone's Mail app. Now, it's time to test your incoming and outgoing mail functions. Please note that test emails may take a short while to send and be received by the intended recipient.
Need Further Assistance? Encountering difficulties setting up your email on iPhone? Don't worry! Simply submit a ticket or contact our support team, and we'll provide all the assistance you need.
For Effective Troubleshooting: To expedite the troubleshooting process, we recommend submitting a ticket with the email account details and screenshots of your current settings. This will enable our support team to quickly identify and resolve any issues you may encounter.
Seamless email setup for your iPhone awaits! With EpicHoster's personalized support, configure your email effortlessly. Experience hassle-free email management today!
